
Juggling several social media accounts across multiple platforms can be quite the challenge. I rely on a variety of digital marketing tools to streamline my social media activity, and top of the list is Hootsuite.
What Is Hootsuite?
Hootsuite is a very useful application for managing all your social media channels in one place. The basic Hootsuite plan is free. It enables you to view and monitor multiple streams in a single dashboard and allows you to keep tabs on key phrases, terms, keywords, brand mentions, etc.
What are the Benefits of Using Hootsuite?
Among the many benefits of using Hootsuite (either as part of a team or as an individual) is the ability to save time by scheduling your social updates in advance. Simply pick a day and time of your own choosing. This enables you to create a social media schedule that includes optimal times when your audience is online – even when you aren’t.
How To Use Hootsuite.
In today’s post, I am going to take you step-by-step through the process of setting up a Hootsuite account, and how to get the most from it.
Step 1: Create a Hootsuite account

Go to https://hootsuite.com and click Sign Up in the top-right corner.
Click to select the plan type that fits your needs. If you’re looking for a free plan, scroll down the page until you come to this:
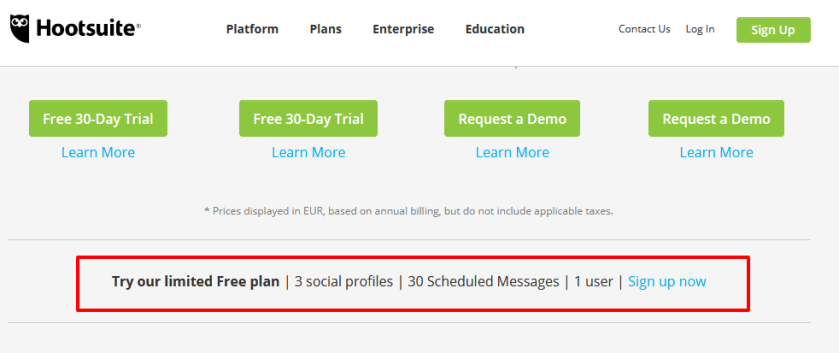
A free plan is perfect for an individual just getting started.
Enter your information.
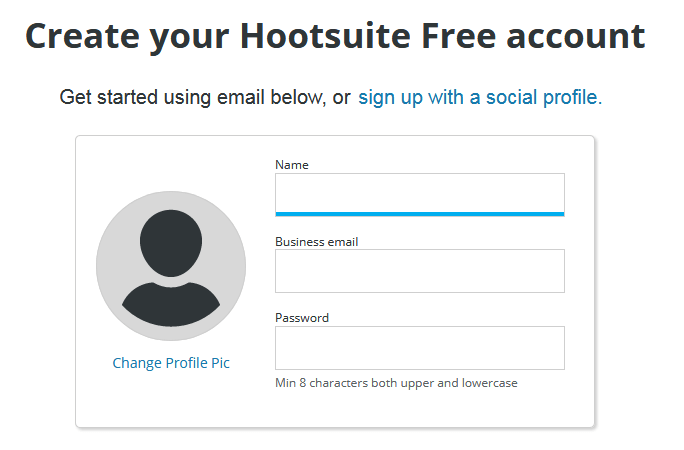
Once you set up an account and log in, Hootsuite will guide you through the basics of connecting networks and organizing streams.
Step 2: Add social networks
Hootsuite is optimized for managing Twitter accounts, but you can also post to your personal Facebook and LinkedIn accounts, as well as to pages and groups of which you’re a member or administrator. You can manage up to three social networks with Hootsuite Free.
In the Hootsuite dashboard, select Streams ![]() from the launch menu.
from the launch menu.
Click Add Social Network

Select a social network from the list.

Click Connect – you will then be asked to authorize your accounts to connect to the Hootsuite dashboard.
Step 3: Set up tabs and streams
Now that you’ve added social networks to your dashboard, set up streams for each one to monitor conversations and engage with your followers.

Select Streams ![]() from the launch menu.
from the launch menu.
Click Add Tab ![]() in the top-left corner, give it a name, and then press ENTER.
in the top-left corner, give it a name, and then press ENTER.
Inside each tab, click Add Stream.

Click the streams you want to add for that profile.
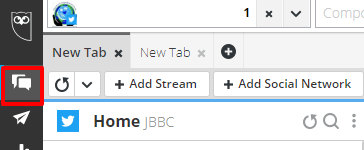
Below is a screenshot of how my own Hootsuite dashboard looks with just three streams added.

You can add more streams and you can drag and drop the order of each stream to suit you.
Add a Search Stream
Search streams are especially valuable for finding social activity around specific users, locations, hashtags or keywords.
To add a search stream
Select Streams ![]() from the launch menu.
from the launch menu.
Select a social network from the list on the left, and then select a profile from the drop-down list. I’ve chosen to search for keywords on Twitter in this example.
Enter a search term. You can enter up to 3 words or phrases you would like to track.

Twitter searches can include more complex queries. Click Show examples to see how to format search queries. (It’s not essential to include this step unless you want to do a more robust search.)

Click Add Stream when you are done.
This will create a real-time stream of people who are tweeting using that keyword.

For more detailed information on adding Search Streams, visit Hootsuite’s Guide.
Step 4: Publish messages
When you want to publish an update, follow these steps. Click New Post ![]() in the top-right corner of the dashboard.
in the top-right corner of the dashboard.
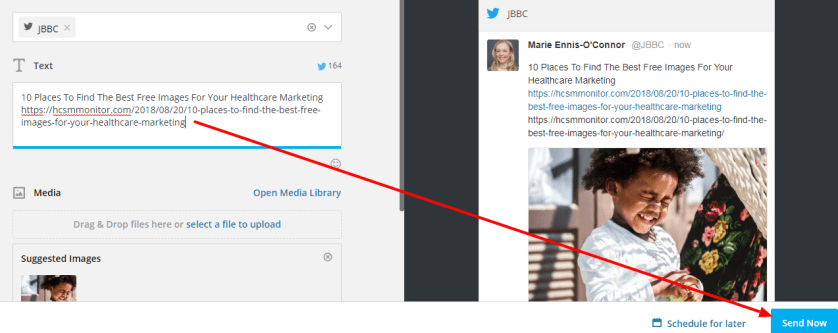
This brings up a full-screen Composer window which lets you preview your posts on each social network before you send or schedule them.
Click Select social networks, and then select the social profiles to post your message to. You can search by social network or profile name to surface the right profile.

In the Text field, enter the content of your message. The character count for each social network selected will display above the Text field. To mention a Twitter user, enter @ followed by their username, and then select the correct user from the list that populates.
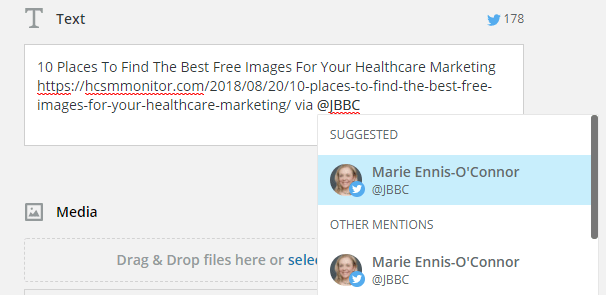
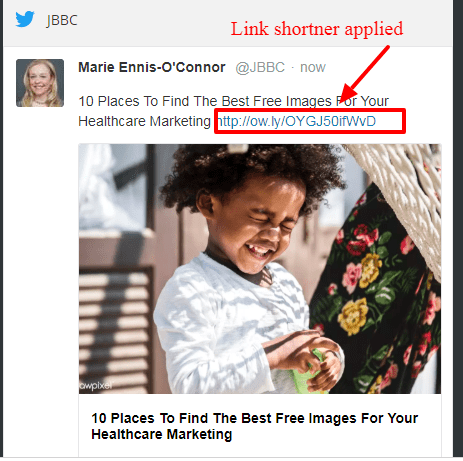
Enter or paste links right into the Text field. You will also be given the option to shorten your link.
A link preview will appear on the right of the Composer screen.
To upload an image, drag and drop files into the Media box or click select a file to upload to attach your own images or a video to your post. Hootsuite will also suggest images it has found in your post to you.

Or, you can click Open Media Library to search free stock images or GIFs to include in your message. Click an image to attach it to your post (you can choose up to 4 images).
 Click Close Media Library in the top-right corner when you’ve chosen an image.
On any attached image, you have the ability to edit, crop, add overlays and text, or make other adjustments to it by clicking on Edit with Creative Cloud.

Click Save when you are done editing.

Find more details about posting images click here.
To post the message right away, click Send Now in the bottom-right corner.
To schedule the message, click Schedule for later, select a date and time to publish the post, click Done, and then click Schedule.
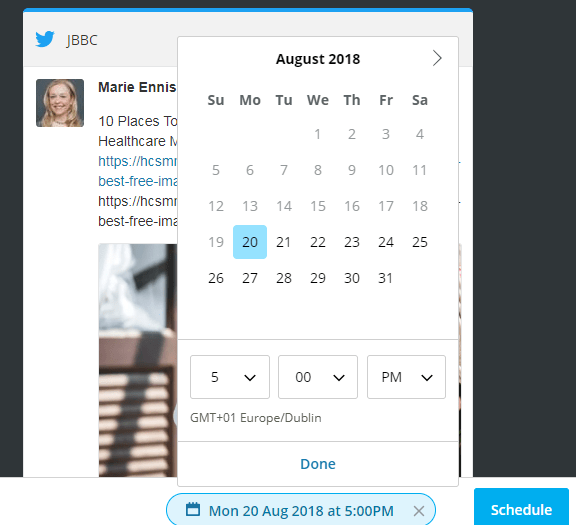
You can view your scheduled posts in an easy-to-read calendar format.

Other Features To Try
Hootsuite on Mobile
You can manage your social media on the go with the Hootsuite mobile apps for Android and iPhone, iPad & iPod Touch. These can be downloaded from your device’s app store.
Advanced Hootsuite
The Hootsuite App Directory is a library of free and paid third-party apps developed to extend the functionality of the Hootsuite dashboard.
- Select App Directory
 from the launch menu.
 - Click Install App beside the app.
- Click Finish.
See Install Apps for more details.
Discover more from Health Care Social Media
Subscribe to get the latest posts sent to your email.
